Bridging Tokens
Curve uses LayerZero to enable cross-chain transfers of CRV, crvUSD, and scrvUSD to other L1 blockchains such as BinanceSmartChain, Avalanche, and Fantom. This guide focuses on bridging using only blockchain explorers, reducing reliance on third-party interfaces and avoiding any additional fees they may charge.
This guide explains how to bridge any of the three tokens from the Ethereum Mainnet to other L1 blockchains or vice versa. The only requirements include having a wallet with the token to be bridged and ETH or the gas token of the L1, depending on the bridging direction, to cover transaction fees.
This guide is applicable for bridging CRV, crvUSD and scrvUSD to other L1 blockchains. When following this guide, one needs to make sure to use the correct contract addresses depending on the token to be bridged.
 CRV
CRV
The contract addresses for bridges are mirrored meaning the bridge contract on Ethereum is the same as the one on the L1 blockchain. But the CRV token address is different for each chain.
 Ethereum:
 0xD533a949740bb3306d119CC777fa900bA034cd52 Binance Smart Chain:
 0x9996D0276612d23b35f90C51EE935520B3d7355B Avalanche:
 0xEEbC562d445F4bC13aC75c8caABb438DFae42A1B Fantom:
 0xE6c259bc0FCE25b71fE95A00361D3878E16232C3
| Chain | Bridge Contract Address | Etherscan Link |
|---|---|---|
| BinanceSmartChain Bridge | 0xC91113B4Dd89dd20FDEECDAC82477Bc99A840355 | Ethereum, BSC |
| Avalanche Bridge | 0x5cc0144A511807608eF644c9e99B486124D1cFd6 | Ethereum, Avalanche |
| Fantom Bridge | 0x7ce8aF75A9180B602445bE230860DDcb4cAc3E42 | Ethereum, Fantom |
 crvUSD
The contract addresses for bridges are mirrored meaning the bridge contract on Ethereum is the same as the one on the L1 blockchain. But the crvUSD token address is different for each chain.
- Ethereum:
0xf939E0A03FB07F59A73314E73794Be0E57ac1b4E - Binance Smart Chain:
0xe2fb3F127f5450DeE44afe054385d74C392BdeF4 - Avalanche:
0xCb7c161602d04C4e8aF1832046EE08AAF96d855D - Fantom:
0xD823D2a2B5AF77835e972A0D5B77f5F5A9a003A6
| Chain | Bridge Contract Address | Etherscan Link |
|---|---|---|
| BinanceSmartChain Bridge | 0x0A92Fd5271dB1C41564BD01ef6b1a75fC1db4d4f | Ethereum, BSC |
| Avalanche Bridge | 0x26D01ce989037befd7Ff63837A86e2da32E7D7e2 | Ethereum, Avalanche |
| Fantom Bridge | 0x76EAfda658C54548B460B3f190386699DE3827d8 | Ethereum, Fantom |
 scrvUSD
The contract addresses for bridges are mirrored meaning the bridge contract on Ethereum is the same as the one on the L1 blockchain. But the crvUSD token address is different for each chain.
- Ethereum:
0x0655977FEb2f289A4aB78af67BAB0d17aAb84367 - Binance Smart Chain:
0x0094Ad026643994c8fB2136ec912D508B15fe0E5 - Avalanche:
0xA3ea433509F7941df3e33857D9c9f212Ad4A4e64 - Fantom:
0x5191946500e75f0A74476F146dF7d386e52961d9
| Chain | Bridge Contract Address | Etherscan Link |
|---|---|---|
| BinanceSmartChain Bridge | 0xAE0666C978500f2C05784242B79B08C478Dd999c | Ethereum, BSC |
| Avalanche Bridge | 0x26E91B1f142b9bF0bB37e82959bA79D2Aa6b99b8 | Ethereum, Avalanche |
| Fantom Bridge | 0x08132eA9b02750E118cF5F5C640B7c46A8E638E8 | Ethereum, Fantom |
| ::: |
Bridging tokens from Ethereum to an L1 blockchain
Step 1: Approve the Bridge Contract to Spend Your Tokens
-
Navigate to the contract of the token you want to bridge on Etherscan.
-
Connect your wallet by navigating to
Contract>Write Contractand clicking theConnect to Web3option.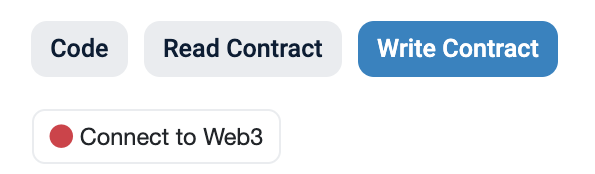
-
Look for the
approvemethod and approve the according bridge contract as a spender.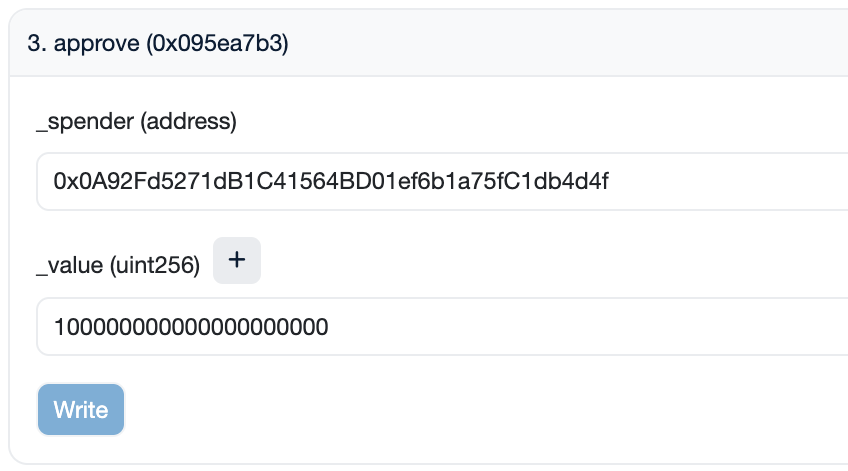
_spender: Enter0x0A92Fd5271dB1C41564BD01ef6b1a75fC1db4d4f, the bridge contract address. This address is the same for all tokens._value: Specify the amount in 1e18 format (for example, for 100 crvUSD, enter100000000000000000000).
Again, to avoid manually entering the amount in 1e18 format, you can input the amount of tokens you wish to bridge and then append 18 zeros by using the
+button.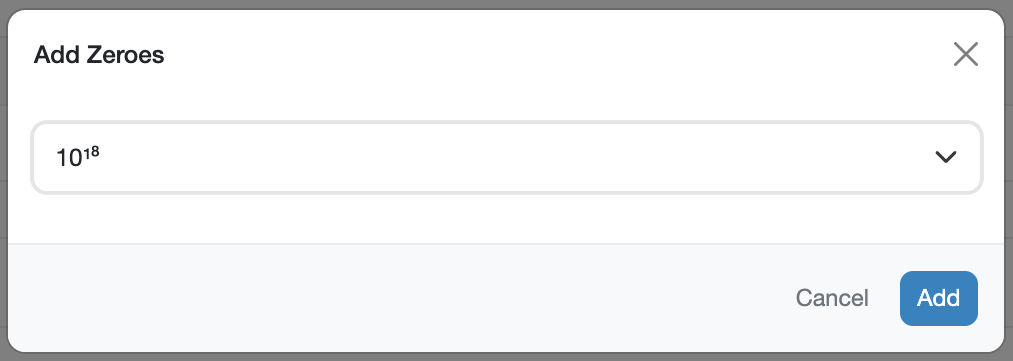
-
Click
Write. A transaction should pop up in your wallet which you need to sign to complete the approval.
Step 2: Read Contract and Quote ETH Amount
-
Visit the bridge contract on Etherscan. This contract address is different depending on the token to be bridged and where it is being bridged to. This time, there is no need to connect your wallet.
-
Use function
1. quoteto determine the bridging cost.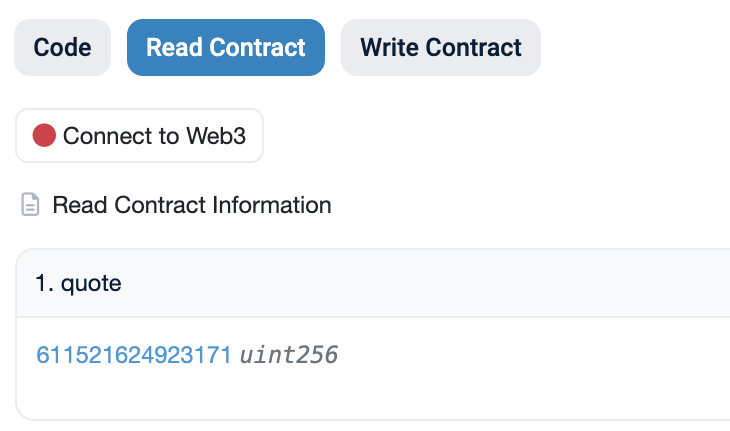
The
quoteamount represents the cost (in ETH) of calling the bridge method in the next step. This does not include gas costs, which need to be paid on top of the quoted amount.
Step 3: Bridge the token to the L1 blockchain
-
Access the bridge contract on Etherscan. This contract address is different depending on the token to be bridged and where it is being bridged to.
-
Connect your wallet by navigating to
Contract>Write Contractand clicking theConnect to Web3option. -
Navigate to method
2. bridgeand input your values. On this contract, there might be multiple methods with the same name. Make sure to select the one which looks like the one in the image down below (it should have three input parameters:bridge,_amountand_receiver).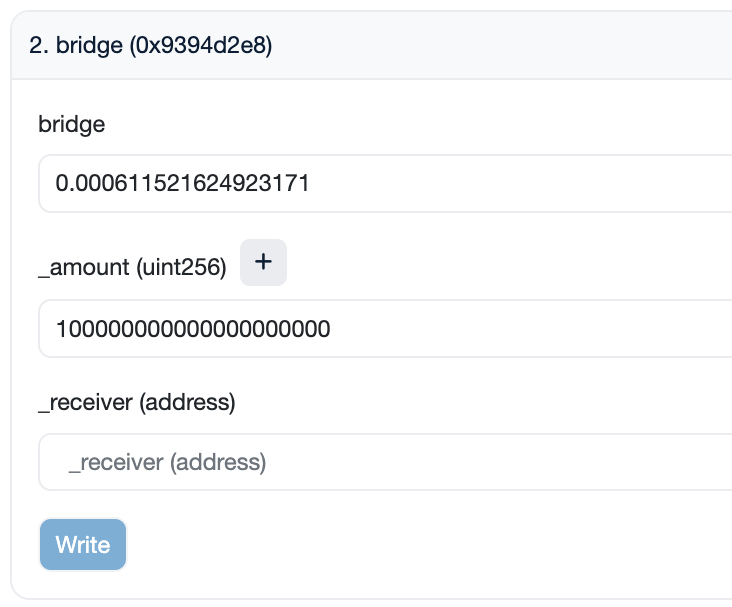
bridge: Enter theETHamount quoted in Step 2. Ensure you enter the amount denominated in Ether (quoted amount / 1e18)._amount: Specify the amount of tokens to bridge in 1e18 format._receiver: Enter the wallet you wish to receive the tokens to.
Alternatively, to avoid manually entering the amount in 1e18 format, you can input the amount of tokens you wish to bridge and then append 18 zeros by using the
+button. -
Click
Write. A transaction should pop up in your wallet which you need to sign to complete the bridging process.
The bridging transaction will not be settled immediately. After completing these steps, it may take a few minutes for your tokens to be successfully bridged to the L1.
Bridging tokens from an L1 blockchain to Ethereum
Step 1: Approve the Bridge Contract to Spend Your Tokens
-
Navigate to the token contract on the block explorer for the L1 network you want to bridge from. For example, to bridge crvUSD from BSC to Ethereum, you would need to navigate to the crvUSD token contract on BSCScan. All token addresses are listed in the table at the top of the page.
-
Connect your wallet by navigating to
Contract>Write Contractand clicking theConnect to Web3option. -
Look for the
approvemethod and approve the according bridge contract as a spender._spender: Enter the contract address of the bridge on the L1 blockchain._value: Specify the amount in 1e18 format (for example, for 100 crvUSD, enter100000000000000000000).
Alternatively, to avoid manually entering the amount in 1e18 format, you can input the amount of tokens you wish to bridge and then append 18 zeros by using the
+button. -
Click
Write. A transaction should pop up in your wallet which you need to sign to complete the approval.
Step 2: Read Contract and Quote the Fee Amount
-
Visit the bridge contract on the L1 blockchain you want to bridge from.
-
Use function
1. quoteto determine the bridging cost.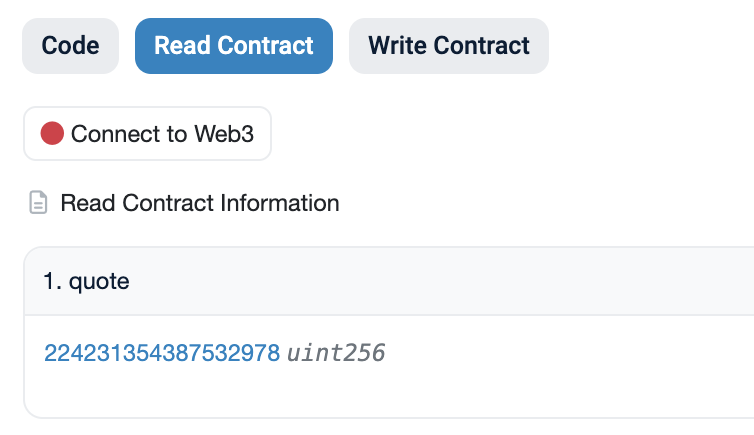
The
quoteamount represents the cost (in the gas token of the L1 blockchain) of calling the bridge method in Step 3. This does not include gas costs, which need to be paid additionally.
Step 3: Bridge Tokens to Ethereum
-
Access the bridge contract on the L1 blockchain you want to bridge from.
-
Connect your wallet by navigating to
Contract>Write Contractand clicking theConnect to Web3option. -
Navigate to method
2. bridgeand input your values. On this contract, there might be multiple methods with the same name. Make sure to select the one which looks like the one in the image down below (it should have three input parameters:bridge,_amountand_receiver).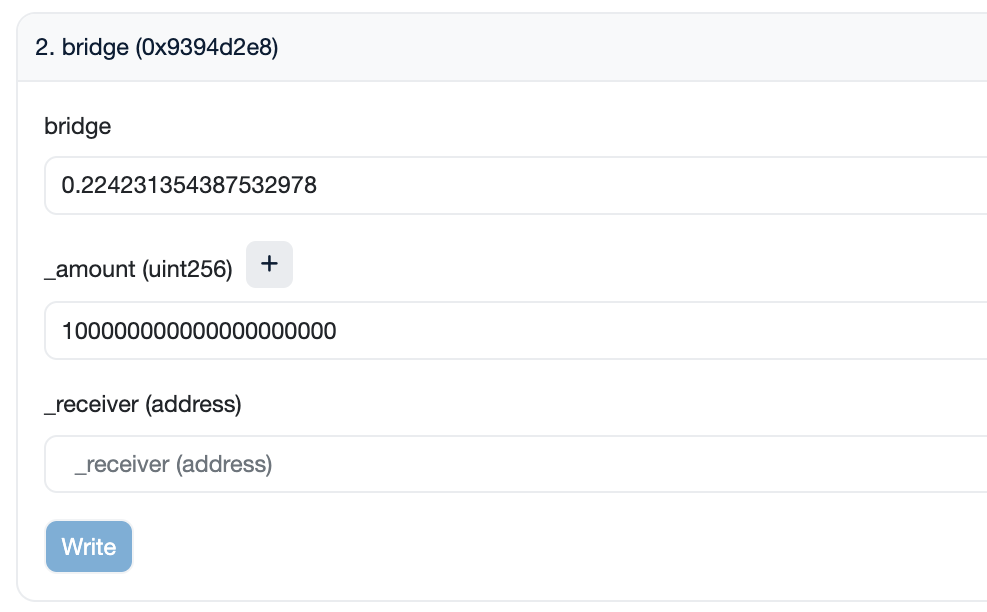
bridge: Enter the ETH amount quoted in Step 2. Ensure you enter the amount denominated in Ether (quoted amount / 1e18)._amount: Specify the amount of tokens in 1e18 format._receiver: Enter the wallet you wish to receive the tokens to.
Alternatively, to avoid manually entering the amount in 1e18 format, you can input the amount of tokens you wish to bridge and then append 18 zeros by using the
+button. -
Click
Write. A transaction should pop up in your wallet which you need to sign to complete the bridging process.
The bridging transaction will not be settled immediately. After completing these steps, it may take a few minutes for your tokens to be successfully bridged to the L1.